Showing posts with label tutorial. Show all posts

Sunday, 15 August 2010

Picot Edge Cast Off

Picot Edge Cast Off
This knitted edging makes a pretty finish for a feminine look.

1. To start - knit 2 stitches, pass first stitch over second stitch, as you would for a cast off stitch.
2. Pass the stitch from the right hand needle back over to the left hand needle.
3. Make two stitches onto the left hand needle by making backward loops.
4. Cast off four stitches.
Repeat instructions, 2, 3, 4 as required.

Ready to begin picot cast off edge.


1. Knit 2 stitches, pass first stitch over second stitch, as you would for a cast off stitch.


2. Pass the stitch from the right hand needle back over to the left hand needle.


3. Make two stitches onto the left hand needle by making backward loops.


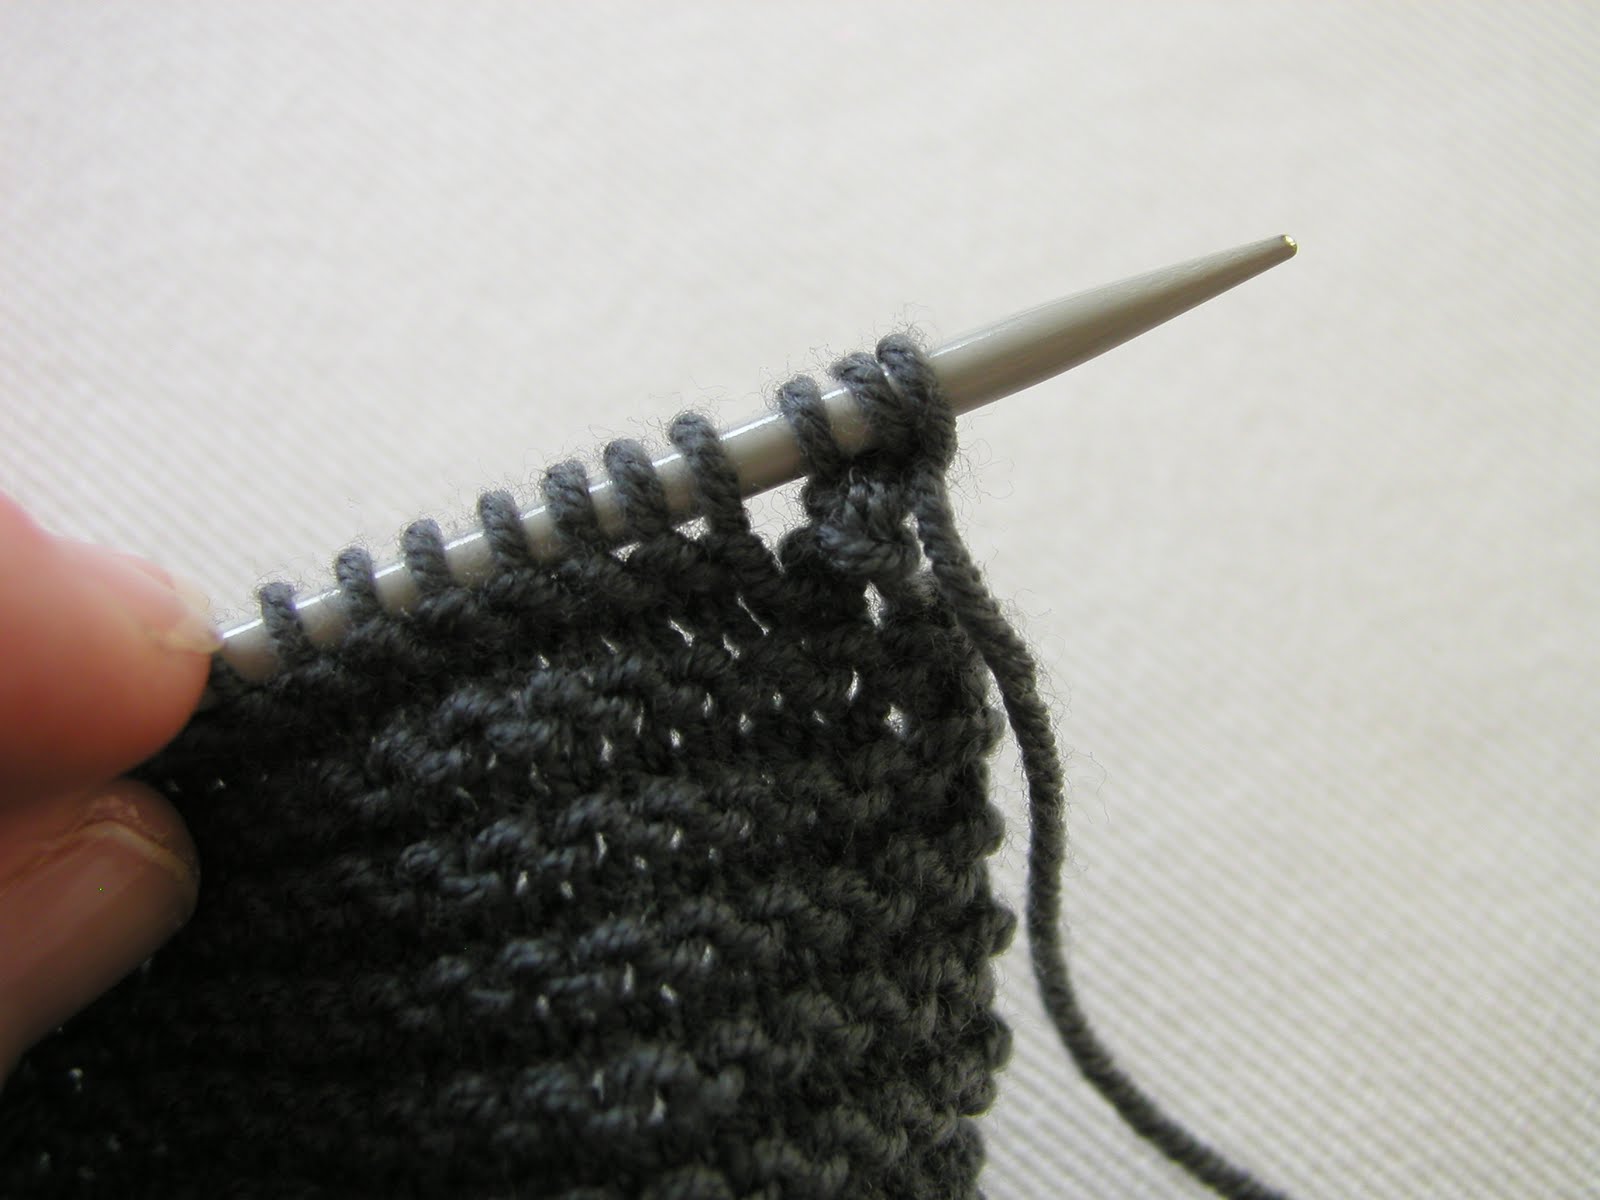
Picture shows first stitch passed back onto left needle with the two new stitches made by backward loops.


4. Cast off four stitches


Continue instructions 2, 3, 4 as required.

Enjoy!

Friday, 15 January 2010

Channel Island cast on


This cast on method makes an attractive edging for many types of item. It is a lot easier to do than it looks. Try practicing with chunky needles, say 6mm, and some left over chunky yarn. I've opted for starting with a slip knot using the double thickness yarn but you can start with a slip knot using the single thickness yarn. I also found it is better to follow the cast on row with a few rows of knit stitch to stop the edge from "curling".

Just experiment and see what works for you...I used this cast on method for some fingerless gloves in the previous post click here to see.

Tip - remember to do the "yarn over" in between each stitch.

If you would like more detailed instructions, have a look at this very good YouTube video by oftroy, click here.


1. Start with a long tail. Double the length of yarn and make a slip knot as you would for a long tail cast on.


2. Grip the short spare piece out of the way in your right hand.


3. Using the single yarn (from the ball) put the "yarn over".


4. Wrap the double strand tail counter clockwise around the left thumb and push the needle up through as if you were making a knit stitch....


5. Pass the single "yarn over ".

6. Pass the double strands over as if making a knit stitch.

7. Pull firm and you have the first "knot" of the picot edging.


8. Continue with yarn over in between each stitch....


9. Keep working until you have a row of "knots".

10. Follow this cast on row with a few rows of knit stitch to prevent the edge from "curling".

Tuesday, 29 September 2009

How to knit a cable


There are many different cable stitches. The following tutorial shows how to knit a basic front cable stitch on a small knitted swatch.

The knitting abbreviation for this particular cable stitch is,

C6F = Cable 6 Front

Work knitting until you reach the 6 cable stitches then:
1. Slip the next 3 stitches onto the cable needle,
2. Hold the cable needle in front of the work,
3. Knit the next 3 stitches from the left hand needle onto the right hand needle.
4. Then knit the stitches from the cable needle onto the right hand needle.


You will need
to be able to cast on
to do knit stitch
to do purl stitch
a small amount of left over yarn
one pair of knitting needles
one cable needle (or you can use a double pointed needle)

Cable Swatch
Cast on 14 stitches.
Row 1: Purl 4, Knit 6, Purl 4.
Row 2: Knit 4, Purl 6, Knit 4.
Row 3: as row 1.
Row 4: as row 3.
Row 5: Purl 4, C6F, Purl 4.  
(Row 5 is shown in the following images).

Keep repeating rows 2-5 to practice the stitch.


Row 5: Purl 4 stitches, then  
1. Slip the next 3 stitches onto the cable needle.


2. Hold the 3 stitches in front of the work.


3. Knit the next 3 stitches from the left needle to the right needle.


4. Knit the 3 stitches from the cable needle onto the right hand needle.


Purl the remaining 4 stitches from the left needle to the right needle, Row 5 is completed.


Continue knitting Rows 2 to 5 and repeat as many times as needed to practice C6F.